

Making wedding place cards doesn't need to be overwhelming or require hand-writing 150 individual names with calligraphy pens. With a clear guest list and the right digital workflow, you can design and generate print-ready wedding place cards in under 10 minutes.
Whether you're planning a black-tie ballroom reception or an intimate backyard dinner, this step-by-step guide covers everything: what to write, which format to choose, paper recommendations, and how to automate the entire process from your spreadsheet.
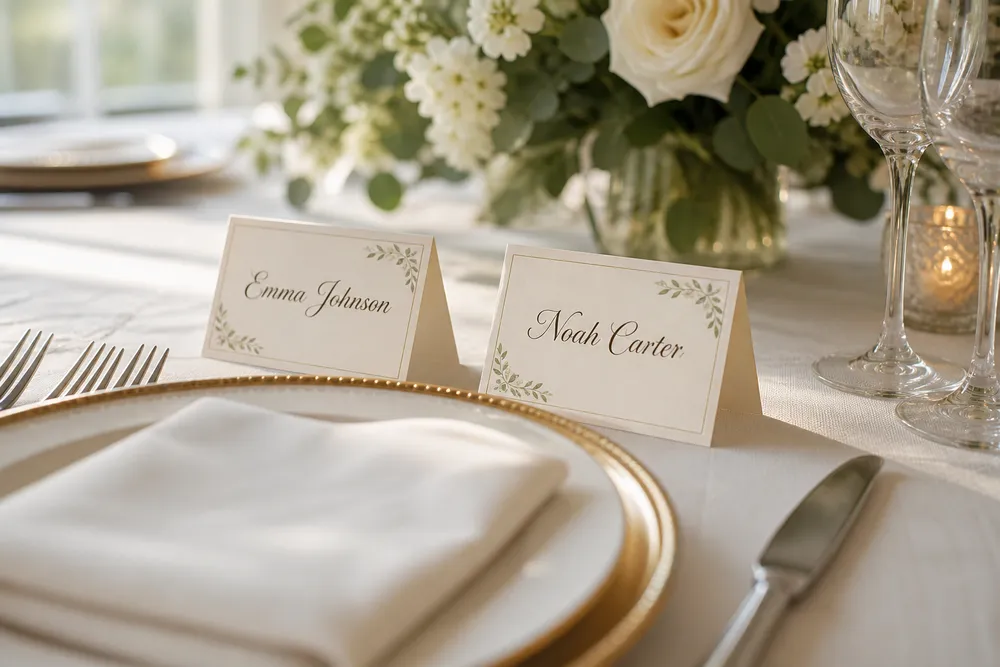
1. What Goes on a Wedding Place Card?
A wedding place card's primary purpose is practical: to guide guests to their designated seat and signal dietary choices to catering staff. Keep the card readable and uncluttered.
Essential Information
- Guest Name: Display the guest's full name (or preferred name). Use clear, legible typography—guests should be able to read their name in dim candlelight or ambient venue lighting.
- Table Assignment: While often provided at the entrance via escort cards or a seating chart, having the table number on the card helps staff ensure cards are placed at the correct table during setup.
Optional (but Recommended) Details
- Meal Selection Indicators: If you are serving a plated dinner with multiple entree options (e.g., Filet Mignon, Halibut, Vegetarian), catering staff need an immediate visual cue. You can use discrete text (e.g., Beef, Fish, Veg) or small icons.
- Allergies & Dietary Restrictions: Gluten-free, nut allergy, or vegan indicators help prevent catering mishaps.
- Seat Number: Helpful for long banquet tables or head tables where exact chair ordering matters.
- A Personal Note or Welcome Line: Some couples add a small line such as "Welcome to our celebration" or "Thank you for celebrating with us".
Etiquette Tip: Spell every guest's name correctly. Double-check titles (Dr., Rev., Judge) and suffixes (Jr., III). Avoid abbreviations unless requested by the guest.
2. Place Cards vs. Escort Cards: Do You Need Both?
Couples often confuse place cards with escort cards. Here is the quick distinction:
| Feature | Escort Cards | Place Cards |
|---|---|---|
| Where they are placed | Entrance/foyer table | At each individual seat |
| What they communicate | "Go to Table 5" | "Sit in this exact chair" |
| When to use | Buffet dinners, open seating at tables | Plated dinners, specific assigned seating, meal choice tracking |
- Use Escort Cards if you only care which table guests sit at, but let them choose their seat at the table.
- Use Place Cards if you need exact seat assignments, especially for plated multi-course meals.
- Use Both if you have a large wedding (100+ guests) with plated meals: guests pick up an escort card at the entrance to find their table, then find their personalized place card at their seat.
Want a deeper breakdown? Read our detailed guide on Escort Cards vs. Place Cards.
3. Flat vs. Folded Tent Cards: Choosing Your Format
There are two primary styles of wedding place cards:
1. Folded Tent Cards (Self-Standing)
- Dimensions: Usually 3.5" × 2" when folded (unfolded flat size: 3.5" × 4" or 4" × 3.5").
- Pros: Stand on their own without extra hardware; visible from across the table; traditional and formal.
- Best for: Standard banquet tables, chargers, or plate settings where you want the card upright.
- Printing: Compatible with pre-scored tent stocks like Avery 5302 or standard heavy cardstock scored and folded down the center.
2. Flat Cards (Lay-Flat or in Holders)
- Dimensions: Usually 3.5" × 2" (standard business card size) or 3" × 2".
- Pros: Sleek and modern; can be placed on top of a folded napkin, tucked into a menu card, or held by metallic place card holders, wooden stands, or fruit/cork bases.
- Best for: Contemporary aesthetic, minimalist table settings, or when using custom holders.
4. The 3 Ways to Make Wedding Place Cards
Approach A: Hand-Written / Calligraphy DIY
- Pros: Highly personal, organic, artisanal feel.
- Cons: Extremely time-consuming; mistakes require starting over; last-minute RSVP additions are stressful.
- Verdict: Great for small weddings (< 30 guests) or couples with strong calligraphy skills.
Approach B: Professional Print Shop (Paperlust, Minted, etc.)
- Pros: Luxury finishes (foil stamping, letterpress, acrylic).
- Cons: Expensive ($1.50–$3.50+ per card); long turnaround times (2–3 weeks); costly rush fees for late changes.
- Verdict: Best if you have a generous budget and finalized your guest list weeks in advance.
Approach C: Digital Generation + DIY Print (The Smart Workflow)
- Pros: Instant turnaround; costs pennies per card; zero manual typing for 100+ names; updates take seconds.
- Cons: Requires printing at home or at a local FedEx/Staples shop.
- Verdict: The sweet spot of speed, cost, and professional finish for 95% of couples.
5. Step-by-Step: How to Make Wedding Place Cards in 5 Minutes
Here is the automated workflow using Place Card Maker to transform your wedding guest list into print-ready cards:
Step 1: Prepare Your Guest Spreadsheet
Create a clean spreadsheet in Google Sheets or Excel with columns for:
Guest Name(e.g., "Mr. Alexander Wright & Guest")Table(e.g., "Table 4")Meal Choice(e.g., "Beef", "Halibut", "Vegetarian")
Ensure there are no empty rows and every name is spelled accurately.
Step 2: Select a Wedding Template
Open our Wedding Place Card Templates collection. Choose a style matching your wedding theme:
- Classic & Formal: Serif fonts, minimalist clean lines, neutral colors.
- Floral & Botanical: Soft decorative borders for garden and outdoor weddings.
- Modern Minimalist: Sans-serif typography, clean geometric layouts.
Step 3: Import Your Guest List
Click Import Data to connect Google Sheets or upload your CSV file. The tool automatically maps Name, Table, and Meal fields to your design. All 100+ cards are generated simultaneously—no manual copy-pasting required!
Step 4: Customize & Review
- Adjust fonts, sizes, and spacing to accommodate your longest guest name.
- Check that meal indicators are clearly legible for catering staff.
- Review the preview to ensure everything aligns perfectly.
Step 5: Export Print-Ready PDF
Download the high-resolution PDF laid out for your preferred paper stock:
- Folded tent card layouts (e.g., 4 cards per sheet, Avery 5302 compatible)
- Flat card layouts (e.g., 6 cards per sheet on US Letter or A4)
6. Paper & Printing Best Practices
Recommended Paper Stock
Never use standard 20 lb printer paper—it will sag and look unprofessional.
- Weight: Choose 80 lb to 100 lb cardstock (216–270 gsm). This provides enough rigidity for tent cards to stand firmly without curling.
- Finish: Matte, linen, or eggshell finishes look luxurious, resist fingerprints, and prevent glare under venue lights.
Printer Settings Checklist
- Scale: Always select
100%orActual Size. Never select "Fit to printable area", which shrinks cards and throws off alignment. - Paper Feed: Use the rear tray or manual feed slot for thick cardstock to prevent paper jams.
- Quality: Set print quality to
HighorBest. - Test Run: Always print one proof page on ordinary paper first. Hold it against your cardstock to verify alignment before printing the full batch.
Ready to Make Your Wedding Place Cards?
Skip the hours of hand-writing and the high price tags of custom stationery. Generate personalized, beautifully formatted wedding place cards directly from your spreadsheet today.
- Browse Wedding Place Card Templates
- Open the Free Place Card Maker
- Explore Matching Table Number Templates
Related Wedding Guides
- Escort Cards vs. Place Cards: What's the Difference? — Learn when entrance table cards are better than seat-level cards.
- How to Turn a Wedding Seating Chart into Escort Cards — Transform your seating plan directly into cards.
- What Are Seating Cards? — Unpack common wedding seating terminology.
- Print Place Cards from Google Sheets — Practical spreadsheet setup tips for large guest lists.
- Place Card Sizes Guide — Compare folded tent dimensions, flat cards, and Avery formats.