How-to-Create-Custom-Place-Cards-for-Your-Next-Event

If you're planning a special occasion, whether it's a wedding, corporate event, or dinner party, one small but important detail is often overlooked: place cards. These cards not only serve as a seating chart for your guests, but they also add a personal touch and make your event feel more polished and professional.
But rather than purchasing generic place cards from a party supply store, why not take the opportunity to get creative and make your own? Not only will this save you money, but it also allows you to customize the design to match your event's theme and aesthetic.
In this article, we'll walk you through the process of creating custom place cards for your next event.
Step 1: Gather Your Materials
To get started, you'll need a few basic supplies:
Cardstock: This thick, sturdy paper is perfect for place cards because it won't bend or tear easily. You can find cardstock at any office supply store or online.
Printer: If you have a home printer, you can use it to print out your place cards. If not, you can print them at a local print shop or online printing service.
Pen or pencil: You'll need a writing utensil to handwrite your guests' names on the place cards.
Ruler: A ruler will help you measure and cut your place cards to the right size.
Step 2: Choose a Design
Now for the fun part: deciding on a design for your place cards. You can create a simple, elegant look with a solid-colored cardstock and clean, sans-serif font. Or, if you want something more playful or unique, consider using patterned cardstock or a decorative font.
There are also plenty of free place card templates available online that you can customize with your own text and colors. Just do a search for "free place card templates" and you'll find a wide range of options.
Step 3: Create Your Place Cards
Once you've chosen your design, it's time to create your place cards. If you're using a template, simply open the file in a word processing program like Microsoft Word and type in your guests' names. If you're designing your own place cards from scratch, you can use a word processing program or a graphic design tool like Canva to create your layout.
Once you have your place cards designed and your guest list ready, it's time to print them out. If you're using a home printer, make sure to use the highest quality setting for the best results. And if you're printing at a print shop, be sure to proofread your place cards before sending them off to be printed to avoid any mistakes.
Step 4: Cut and Assemble Your Place Cards
Once your place cards are printed, it's time to cut them out and assemble them. Use a ruler and a pen or pencil to mark where you'll need to cut, and then use a pair of scissors or a paper cutter to carefully cut along the lines.
If you're using a template, the place cards should be the right size already. But if you're creating your own design, you'll need to decide on the size of your place cards based on the size of your table setting. A good rule of thumb is to make the place cards about the same size as the plates they'll be placed in front of.
Step 5: Display Your Place Cards
Now that your place cards are finished, it's time to display them.
There are several ways you can display your place cards at your event:
Place card holders: These small stands or clips hold your place cards upright and can be placed on the table in front of each guest's seat. You can find place card holders at party supply stores or online, or you can make your own using materials like wire, ribbon, or wooden skewers.
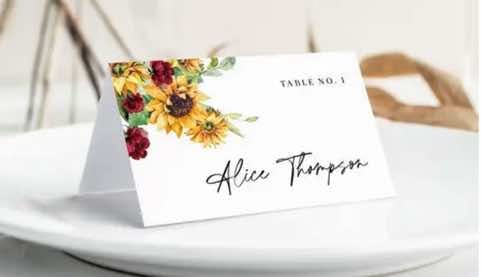
Folded place cards: If you want a more compact option, you can fold your place cards in half and stand them up on the table. This works especially well for smaller events where you have less space.
Escort cards: Rather than placing the place cards on the table, you can create escort cards that your guests can take with them to find their assigned seats. These can be displayed on a table at the entrance of the event or hung on a board or string using clothespins or clips.
Step 6: Plan Your Seating Chart
Before you assemble your place cards, it's a good idea to plan out your seating chart. This will help you ensure that your guests are seated in a way that makes sense for the event and avoids any awkward or uncomfortable situations.
If you're planning a formal event like a wedding or corporate dinner, you'll want to consider the hierarchy of your guests and seat them accordingly. For a more casual event like a dinner party, you might want to mix up the seating arrangements to encourage conversation and introduce people to each other.
No matter what type of event you're planning, it's a good idea to consider the personalities and preferences of your guests when creating your seating chart. If you have any guests with special needs, be sure to accommodate those as well.
Here are a few more tips for creating custom place cards:
-
Make sure to spell your guests' names correctly. This may seem obvious, but it's an easy mistake to make, especially if you have a long guest list. Double-check your spelling before printing or handwriting your place cards to avoid any embarrassing mistakes.
-
Consider the layout of your table setting when designing your place cards. If you have a large, formal table, you may want to create larger place cards to fill the space. But if you have a smaller, more intimate setting, smaller place cards may be more appropriate.
-
Think about the color scheme of your event when choosing your place card design. Your place cards should coordinate with the overall look and feel of your event, so consider using colors that match your decor or theme.
-
Add a personal touch by incorporating a photo or design element that represents your guests. For example, if you're planning a wedding and you have a guest who loves to garden, you could include a small illustration of a flower on their place card.
-
If you're using escort cards, consider using a fun and creative way to display them. You could hang them on a string with clothespins, create a seating chart using a large map or chalkboard, or display them in a fun and unique way that matches your event theme.
I hope these additional tips help you as you create custom place cards for your next event! If you have any other questions, don't hesitate to contact us.