

Microsoft Word is often the first tool people open when they need place cards. It is already installed, handles typography well, and works with most home printers. For a small dinner, a Word table is enough. For a wedding guest list already in Excel, mail merge keeps everything in .docx. For 80+ names that change often, a spreadsheet-to-PDF tool is usually faster.
This guide covers how to make place cards in Word three ways — table layout, tent cards, and Excel mail merge — then when to switch to Place Card Maker.

Quick Answer
To make place cards in Word:
- Decide flat vs tent-fold and the finished size (commonly 3.5″ × 2″).
- In File → New, type Place Cards into the online template search bar — or build a table (or Labels layout) that fits that size on Letter or A4.
- Design the first card: guest name, optional table/meal, readable font, safe margins.
- For a short list, duplicate and type names. For Excel, use Mailings → mail merge (Method 4 below).
- Print a plain-paper proof at 100% / Actual Size, then print on cardstock.
If the guest list already lives in Excel, Google Sheets, or CSV and you do not need a .docx file, skip Word setup and use Place Card Maker.
What You Need Before You Start
- Microsoft Word (2016 or later is fine)
- Cardstock, ideally 65–80 lb (about 176–216 gsm) — not regular 20 lb copy paper
- A printer that can feed thicker stock
- A guest list (handwritten for under ~20 guests; Excel for mail merge)
Pick the card style first:
| Style | Finished size (typical) | Best for |
|---|---|---|
| Flat place card | 3.5″ × 2″ or 3″ × 2″ | Card holders, napkin tuck, modern tables |
| Tent / folded card | 3.5″ × 2″ when folded (blank is often 3.5″ × 4″) | Self-standing cards with no holders |
For more size options, see the place card sizes guide and Avery place card templates if you are printing on pre-scored stock.
Method 1: Make Flat Place Cards with a Word Table
This is the most reliable DIY method when you are not using Avery Labels or mail merge.
Step 1: Set up the page
- Open Word and go to File → New.
- Type Place Cards into the online template search bar. If a result matches your finished size, open it and jump to Step 3; otherwise choose Blank document and continue below.
- Go to Layout → Orientation → Landscape (or Portrait if your grid fits better).
- Set Margins to Narrow (0.5″) or Custom so the table can use more of the sheet.
- Confirm paper size is Letter (8.5″ × 11″) or A4 to match your printer.
Step 2: Insert a table that matches card size
For six 3.5″ × 2″ cards on Letter (a common DIY layout):
- Insert a 2-row × 3-column table (or 3 × 2, depending on orientation).
- Select the whole table → Table Properties.
- Set each cell to 3.5″ wide and 2″ high.
- Turn off Automatically resize to fit contents.
- Center text vertically and horizontally in Cell → Options / Alignment.
You now have six empty place-card frames on one sheet.

Step 3: Design the first card
In the first cell, add:
- Guest name (required)
- Optional Table or seat line
- Optional Meal cue for plated dinners
Formatting tips that print cleanly:
- Use one readable font (classic serif or clean sans-serif)
- Start around 14–18 pt for names; drop a size for long double names
- Keep 0.15–0.25″ padding inside the cell so text never kisses the cut edge
- Add a thin border only if you want a printed frame — thicker borders look heavy when cut
Step 4: Duplicate and fill names
Copy the finished first cell’s formatting to the rest of the table, then type each guest name. For under ~20 guests this is manageable. Past ~40 guests, use Method 4 (mail merge) or import the list into Place Card Maker.
Step 5: Print correctly
- Print one page on plain paper first.
- In the print dialog, set scale to 100% / Actual Size (never “Fit to page”).
- Hold the proof over your cardstock to check alignment.
- Load cardstock and print the final run.
More print detail lives in How to Print Place Cards in Word.
Method 2: Make Tent-Fold Place Cards in Word
Tent cards stand on their own. Word does not ship one perfect “wedding tent card” preset, so start with File → New, type Place Cards into the online template search bar, and open a foldable result if one fits — otherwise build the blank yourself.
Layout idea
- Landscape Letter page.
- A table or text boxes sized so each blank is roughly 3.5″ wide × 4″ tall (unfolded).
- Design the top half only (the face guests see after folding), or mirror the name on both halves if you want two-sided standing cards.
- Lightly mark or leave a center fold line; score after printing, then fold.

Practical tips
- Heavier cardstock (closer to 80 lb) stands better.
- Score before folding so the crease stays sharp.
- Proof one sheet: fold it and place it on a sample plate under dim light to check readability.
If you want blank tent PDFs instead of building from scratch, browse printable place cards or ready templates.
Method 3: Word Labels / Avery Product Numbers
If you bought Avery (or similar) place-card stock:
- Mailings → Labels → Options
- Pick the vendor and product number that matches the package
- Create the label document and design the first label
- Use New Document / update labels, then fill names or connect mail merge (Method 4)
This avoids guessing cell sizes. If alignment still drifts, check that print scaling is off — see common fixes in the Avery place card templates page.
Method 4: Create Place Cards from Excel with Word Mail Merge
Use this when the guest list is already in Excel (or a .csv export) and you want a native .docx result.
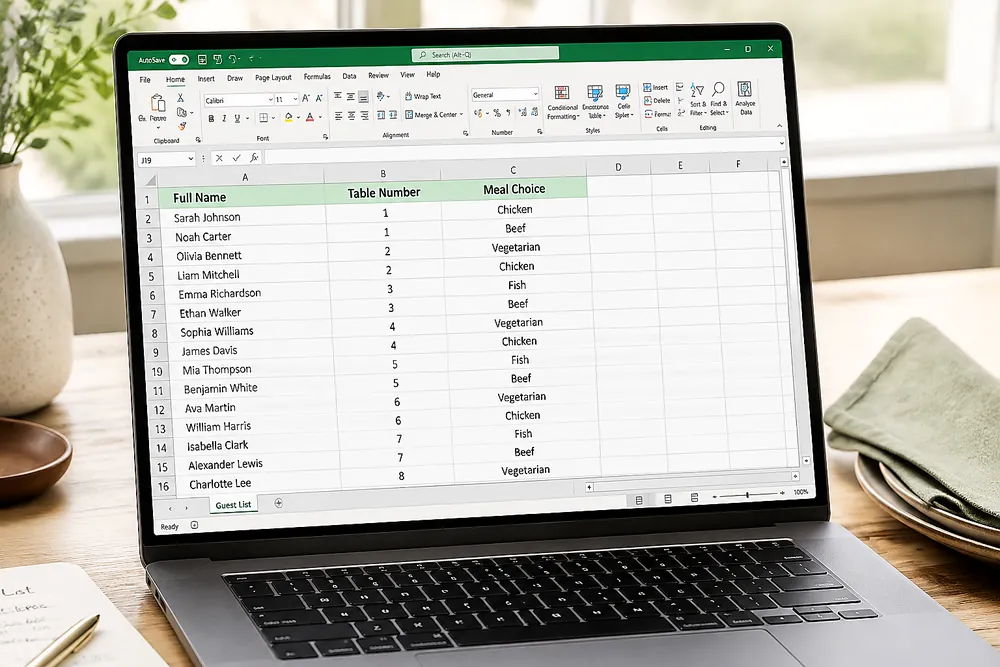
Prepare the Excel guest list
| Column | Example | Notes |
|---|---|---|
First Name | Sarah | Separate first/last for flexible layouts |
Last Name | Johnson | Optional if using a full-name column |
Full Name | Sarah Johnson | Simplest merge field |
Table Number | 5 | Only if you use assigned seating |
Meal Choice | Chicken | Optional — useful for caterers |
Before merging, check:
- No blank rows in the middle of the list
- Headers in Row 1 (no title row above them)
- No special characters in headers (use
Guest Name, notGuest's Name) - Consistent capitalization
- Table numbers stored as numbers, not text with spaces
Save the workbook and note its location.
Set up the Word label document
- Open a new Word document.
- Go to Mailings → Start Mail Merge → Labels.
- In Label Options, select Avery US Letter (or your vendor) and the product that matches your stock.
- Word builds a grid — each cell is one place card.
If you prefer a verified tent-card option, Avery 5302 folds to 3.5″ × 2″ and prints 4 per sheet. Otherwise use custom dimensions for your own folded 3.5″ × 2″ tent card.
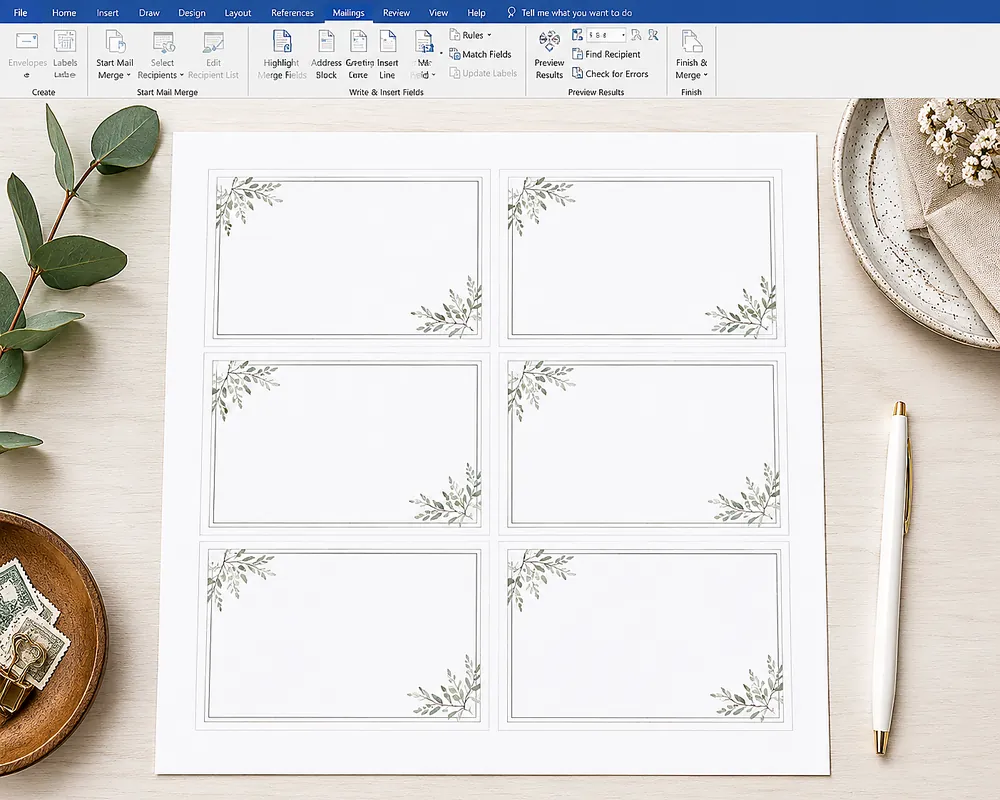
Design the first card and insert merge fields
Click the top-left cell and set font, centering, thin border, and about 0.1″ cell padding. Do not type a guest name yet.
- Mailings → Select Recipients → Use an Existing List → choose your Excel file.
- Mailings → Insert Merge Field → pick Full Name (or First + space + Last).
- You should see
«Full_Name»in the cell. Format that placeholder as you want final names to look.
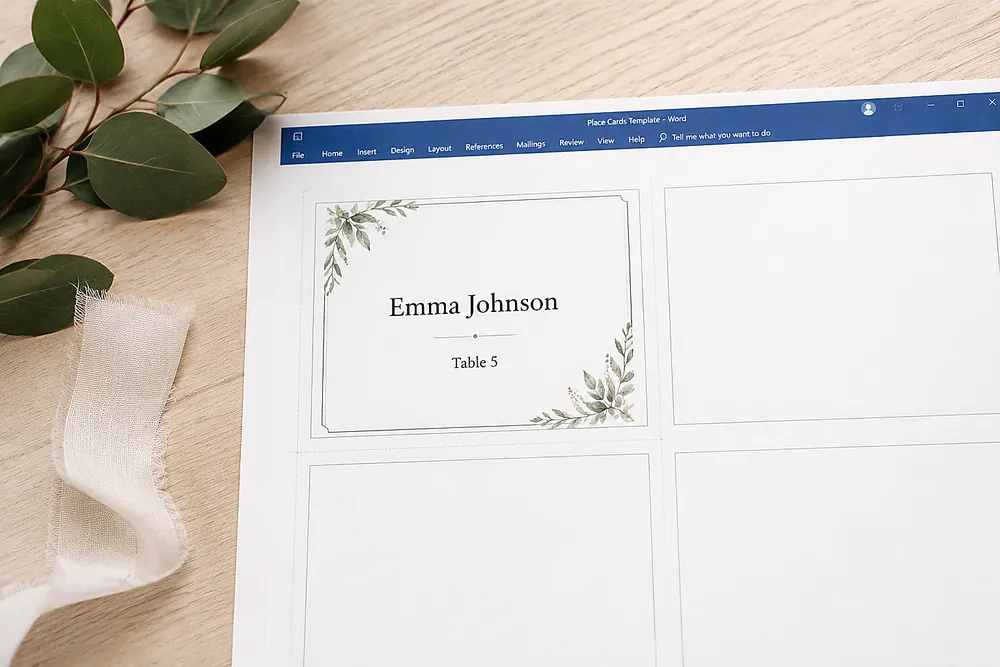
Update labels, preview, and finish
- Mailings → Update Labels — copies the merge field to every cell on the sheet.
- Mailings → Preview Results — page through real names and catch long names or bad capitalization.
- Mailings → Finish & Merge → Edit Individual Documents → All → OK.
- Save the new merged document immediately.
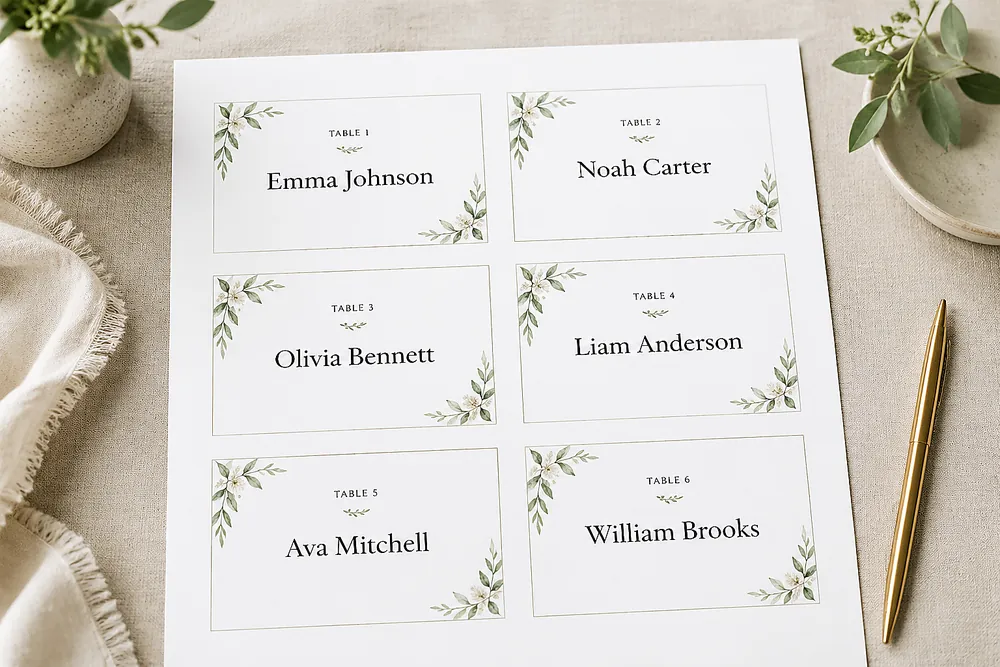
Then print on cardstock at 100% / Actual Size (same rules as Method 1).
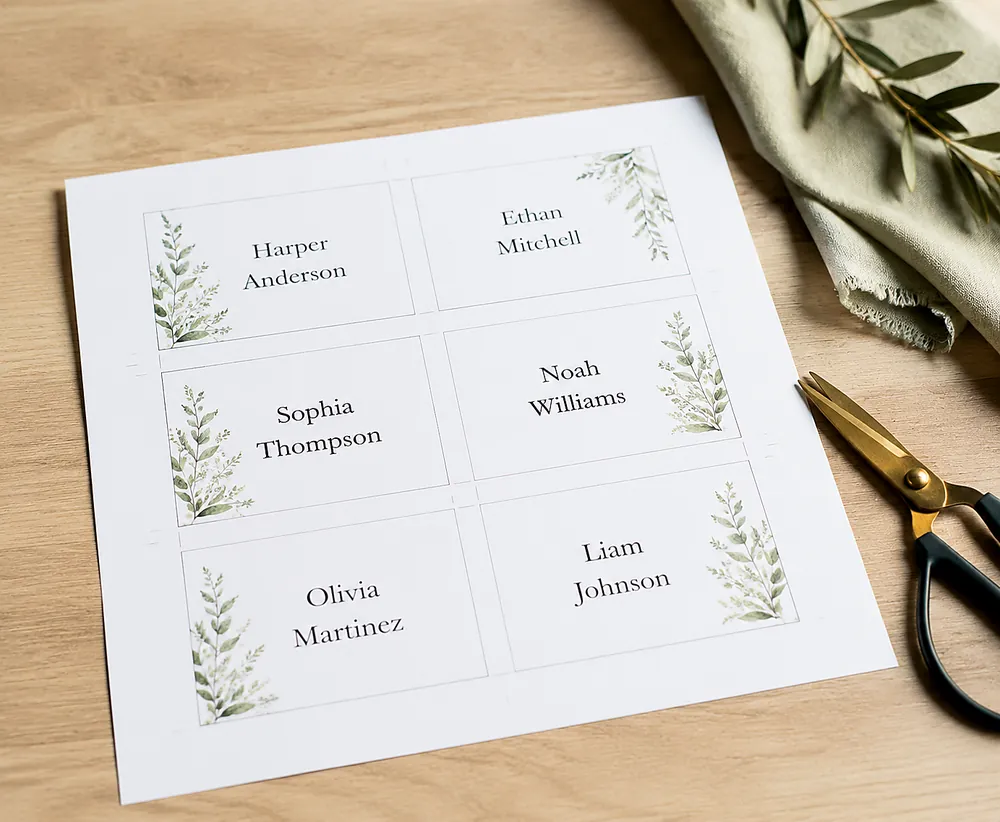
Common mail merge problems
| Problem | Fix |
|---|---|
Names show as {MERGEFIELD Full_Name} | Press Alt + F9 to toggle field codes; confirm recipients are connected |
| Preview only shows 6 guests | Run Finish & Merge → Edit Individual Documents to generate all pages |
| Names truncated | Reduce font size or increase row height |
| Inconsistent formatting | Clear formatting in the first cell, reapply one font/size, then Update Labels again |
| Excel columns missing in Word | Put headers in Row 1; delete any title row above them |
Design Checklist for Word Place Cards
- Spell every name exactly as the guest prefers (titles and suffixes included)
- Prefer full first + last over nicknames unless requested
- Keep optional lines (table, meal) smaller than the name
- Avoid dense decorative borders that fight long names
- Test the longest name on the list before printing the full batch
When Word Works — and When to Use Place Card Maker
| Scenario | Word table / mail merge | Place Card Maker |
|---|---|---|
| Under ~20 guests, simple design | Good | Also works |
You need a .docx file | Native | PDF output |
| Guest list changes often | Re-merge each time | Re-upload the file |
| 50–200+ guests | Slow setup | Same effort as a small list |
| No Microsoft license | Requires Word | Free in browser |
Word is a good fit when you need fewer than ~20 cards, already have a Word template, or specifically need a .docx file.
Word becomes painful when the list lives in Excel / Sheets and changes often, you have 50–200+ unique names, or you want matching wedding / holiday / Avery layouts without rebuilding tables.
That is where Place Card Maker is the better handoff:
- Import Excel, CSV, or Google Sheets (one guest per row)
- Choose a template (including wedding place card templates)
- Map Name / Table / Meal fields
- Preview the full batch and download one print-ready PDF
- Print at 100% / Actual Size on cardstock
Watch the Excel-to-PDF workflow
You skip mail-merge setup, cell-by-cell typing, and most alignment guesswork.
Common Mistakes When Making Place Cards in Word
“Fit to page” shrinks the grid
Cards no longer match cut lines or Avery stock. Always print at Actual Size.
Cell auto-resize breaks the layout
Turn off automatic resizing so one long name does not stretch a single cell and warp the sheet.
Copy paper instead of cardstock
Thin paper curls and looks unfinished. Use 65–80 lb cardstock.
Typing every name for a large event
If the list is already in a spreadsheet, use Method 4 (mail merge) or Place Card Maker instead of retyping.
Related Guides
- How to Print Place Cards in Word — printer settings and small-batch print checks
- Blank Place Card Templates for Word — downloadable Word-friendly layouts
- How to Print Place Cards from CSV — clean CSV import without Word
- How to Print Place Cards from Google Sheets — Sheets-first batch workflow
- How to Print Place Cards — paper, sizes, and full print workflow
- Place Card Sizes — flat vs tent dimensions and Avery notes
Summary
You can make place cards in Word with a sized table, a tent-fold layout, Avery Labels, or an Excel mail merge. Design the first card carefully, keep margins safe, and always print a proof at 100% / Actual Size.
For a handful of guests or a required .docx file, Word is fine. For a full guest list that changes often, open Place Card Maker and generate the batch as one PDF.