How to Make Place Cards for a Wedding or Dinner Party — Video Tutorial
Watch a step-by-step video guide on how to use the free Place Card Maker. Import your guest list, customize a template, set print layout, and print in minutes — no design skills needed.
New to the Place Card Maker? This video walkthrough covers everything from importing your guest list to printing the finished cards.
📹 Video Tutorial
What You'll Need
- A list of guest names (spreadsheet, CSV, or type manually)
- A printer and cardstock paper (80–100 lb recommended)
- About 5–10 minutes
Step 1: Open the Place Card Maker
Go to Place Card Maker. No account or sign-up required.
You'll see a live canvas on the right and a sidebar on the left with tabs for Data, Templates, Elements, Design, and Settings.
Step 2: Import Your Guest List
Option A — Type manually: Click the Data tab → Add Row → type each guest's name (and optional table number or meal choice).
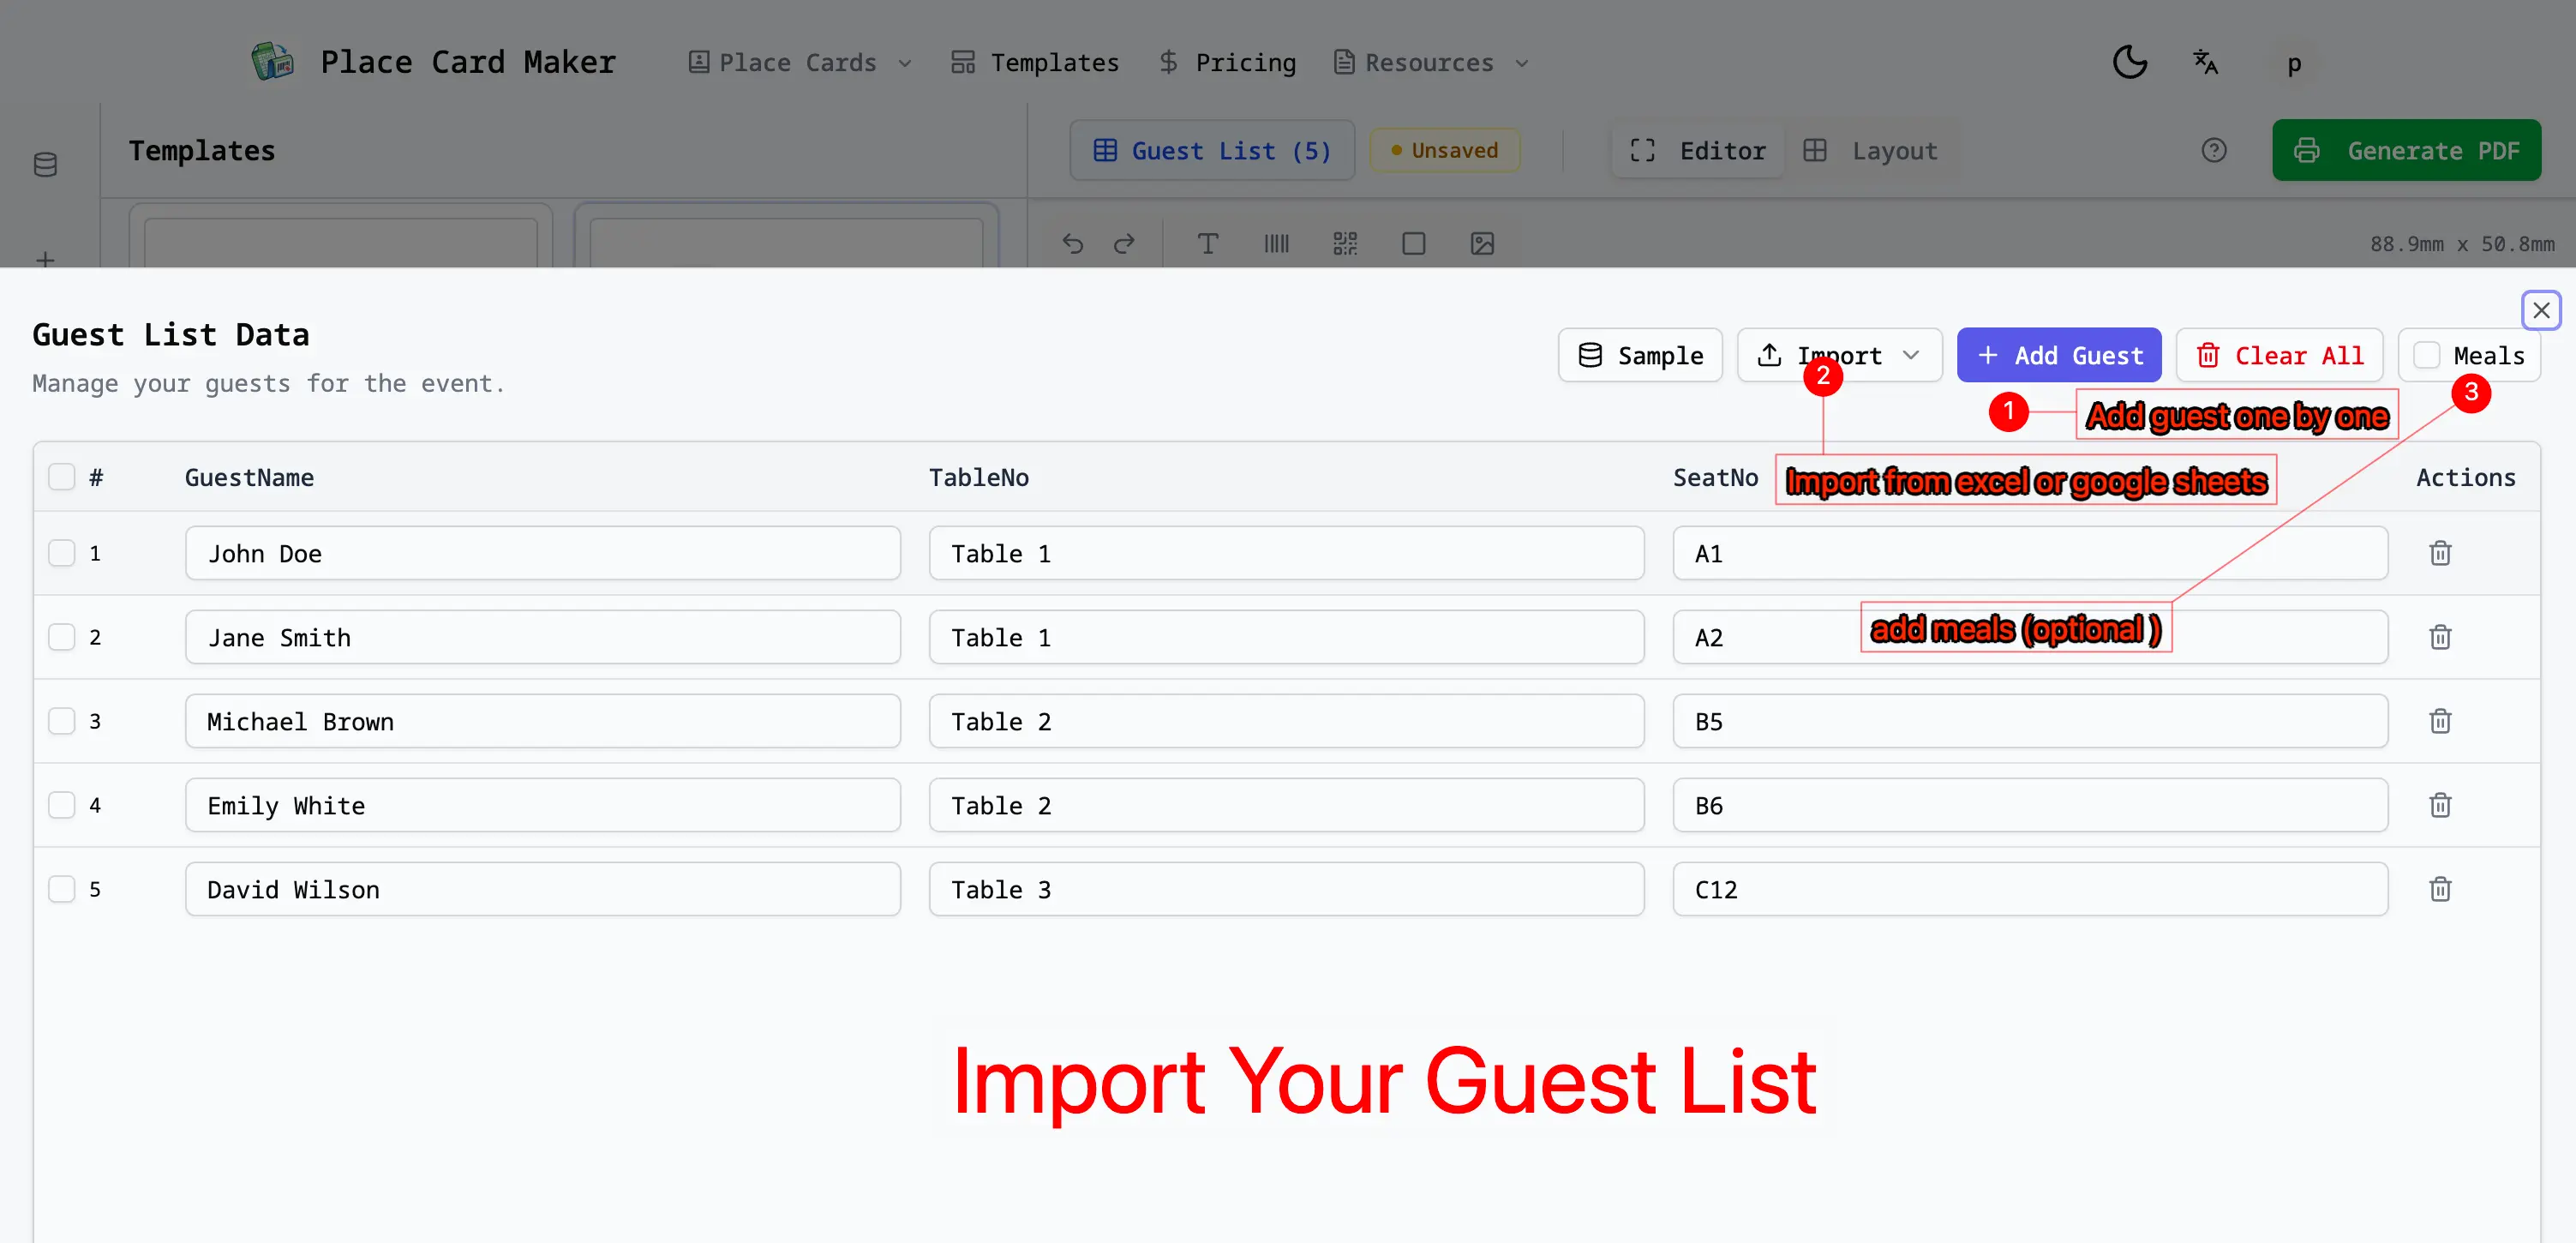
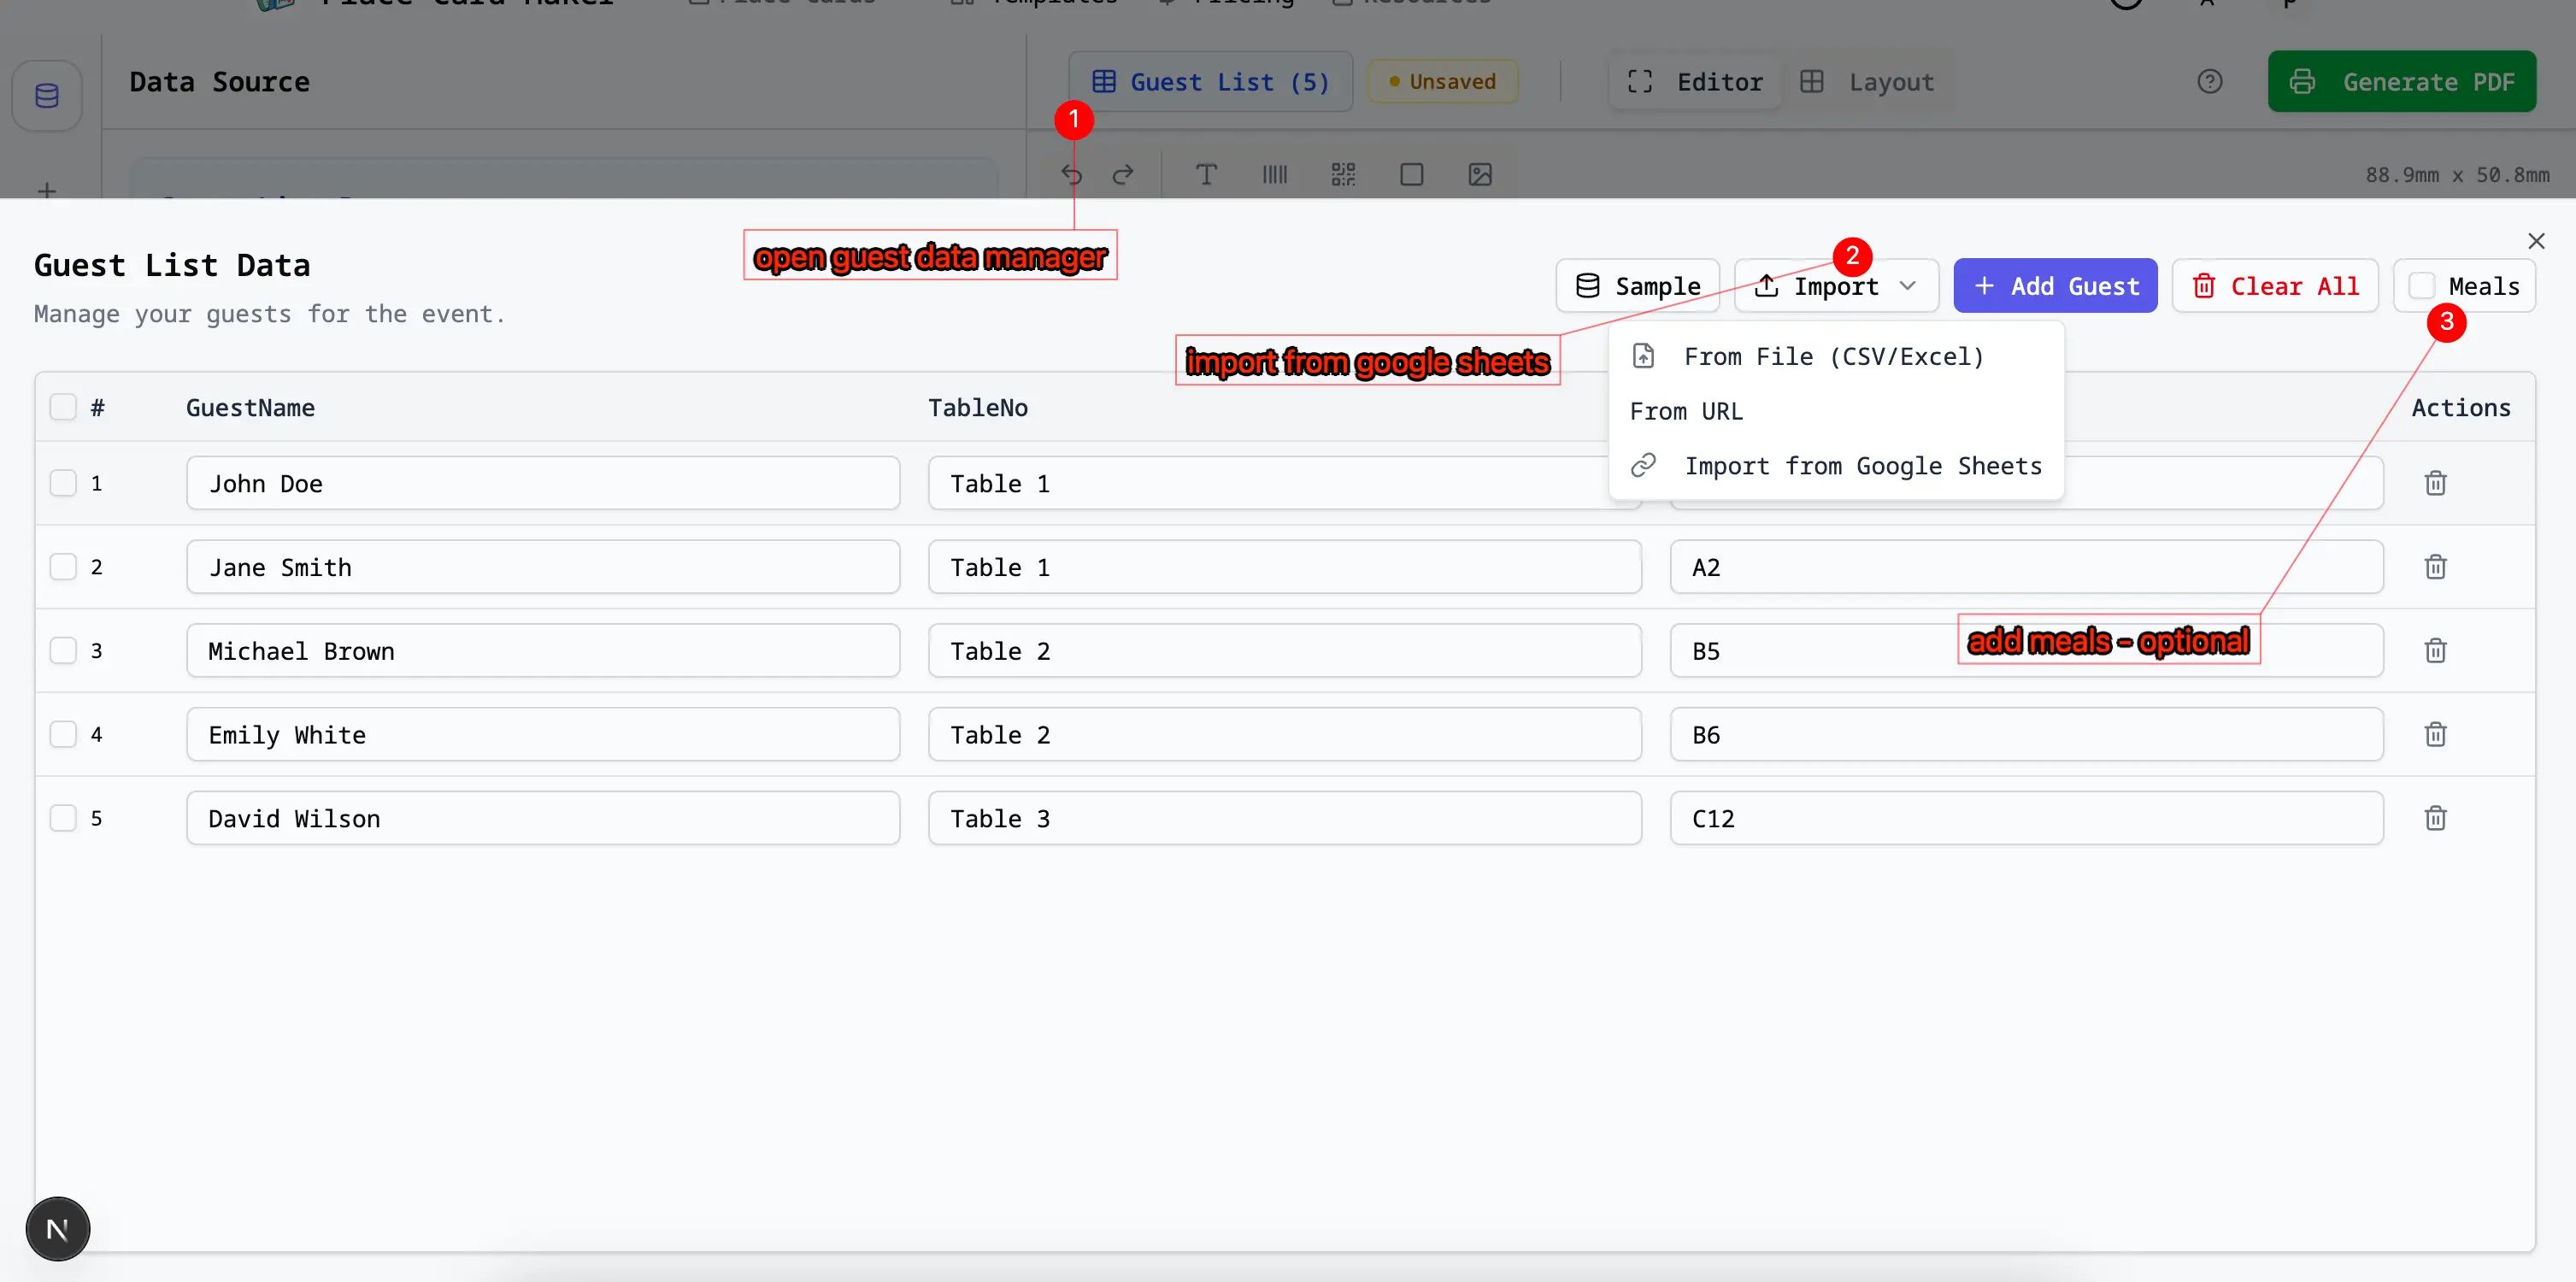
Option B — Import from a spreadsheet (fastest for 10+ guests):
- Prepare your file with columns: Name, Table Number (optional), Meal Choice (optional)
- Click Import in the Data tab
- Upload your
.csvor.xlsxfile and map the columns - All names load instantly into the editor
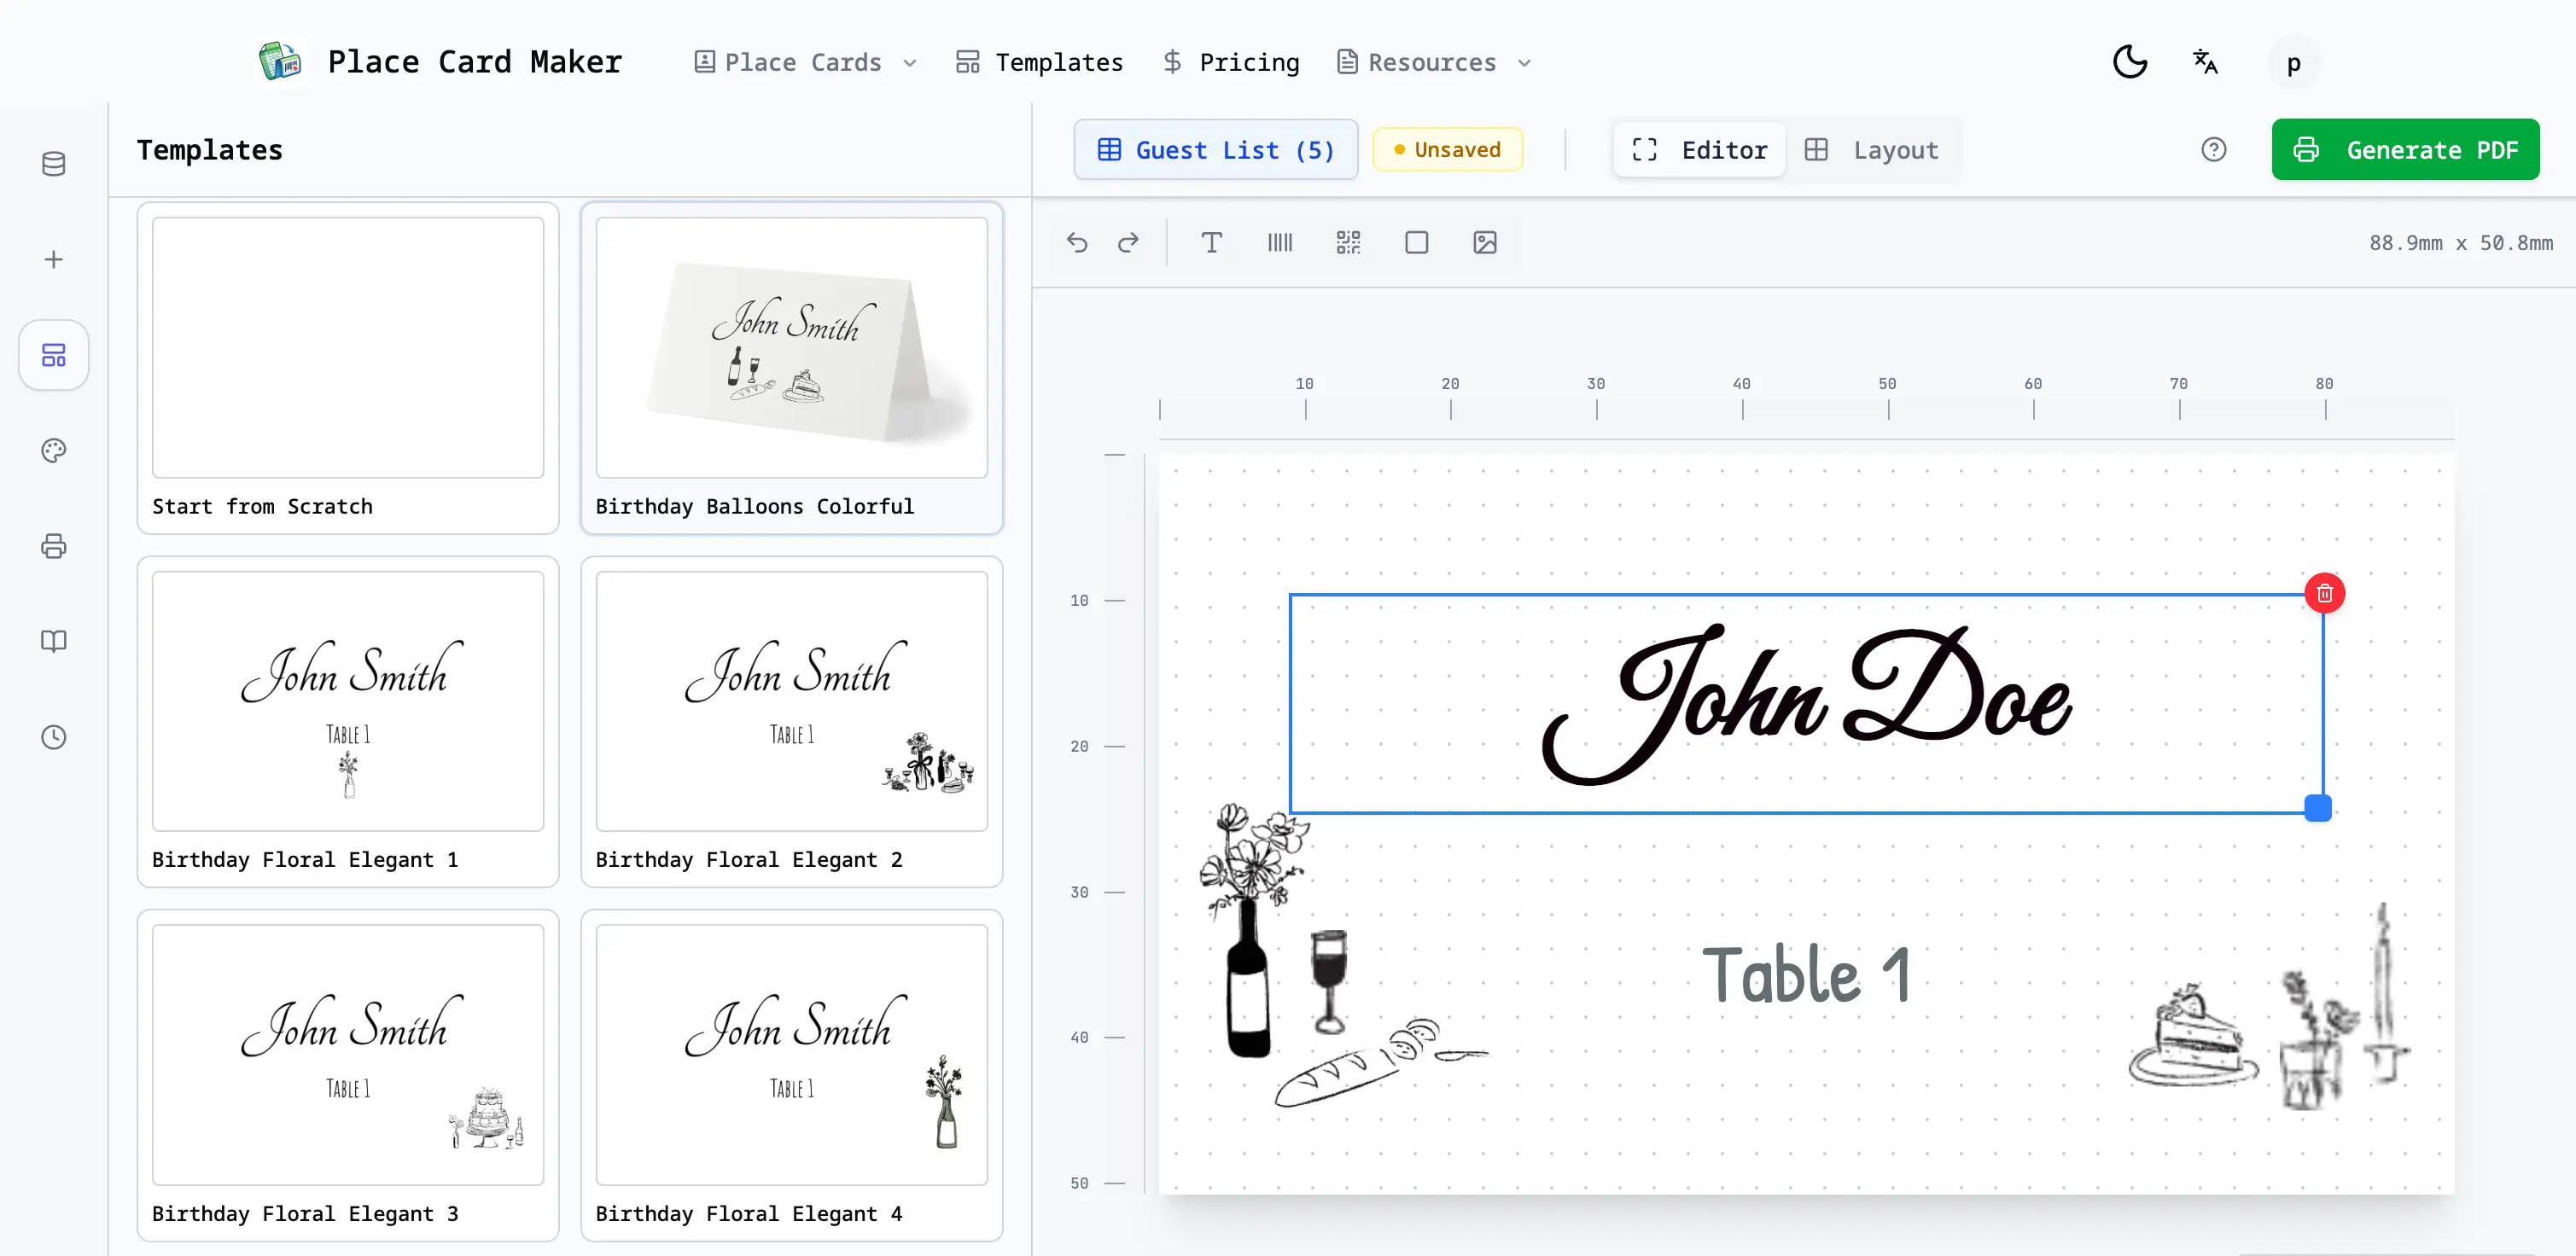
Step 3: Choose a Template
Click the Templates tab in the sidebar and browse by style:
| Category | Best for |
|---|---|
| Wedding | Floral, elegant, classic designs |
| Birthday | Colorful and festive |
| Elegant | Gold, formal, luxury styles |
| Minimal | Clean and modern |
Click any template to apply it instantly to all cards.

Step 4: Customize Design
Switch between the Elements and Design tabs to:
- Change fonts, size, and color
- Adjust background color or upload a background image
- Resize card dimensions (default: 88.9 × 50.8 mm / 3.5 × 2")
- Add meal choice icons — open the meal picker and assign an icon per dietary preference
For tent-fold cards, set the card height to 101.6 mm (4") and fold along the center line after printing.

Step 5: Configure Print Settings
Click the Settings tab and choose:
- Paper size — A4, Letter, or custom
- Cards per sheet — e.g. 6 per sheet (3×2) or 10 per sheet (5×2)
- Margins and spacing — adjust if your printer clips the edges
Common preset: 6 per sheet on A4/Letter for a 3 × 2 layout, or use Avery 5302 when you want a verified 4 per sheet tent-card format.
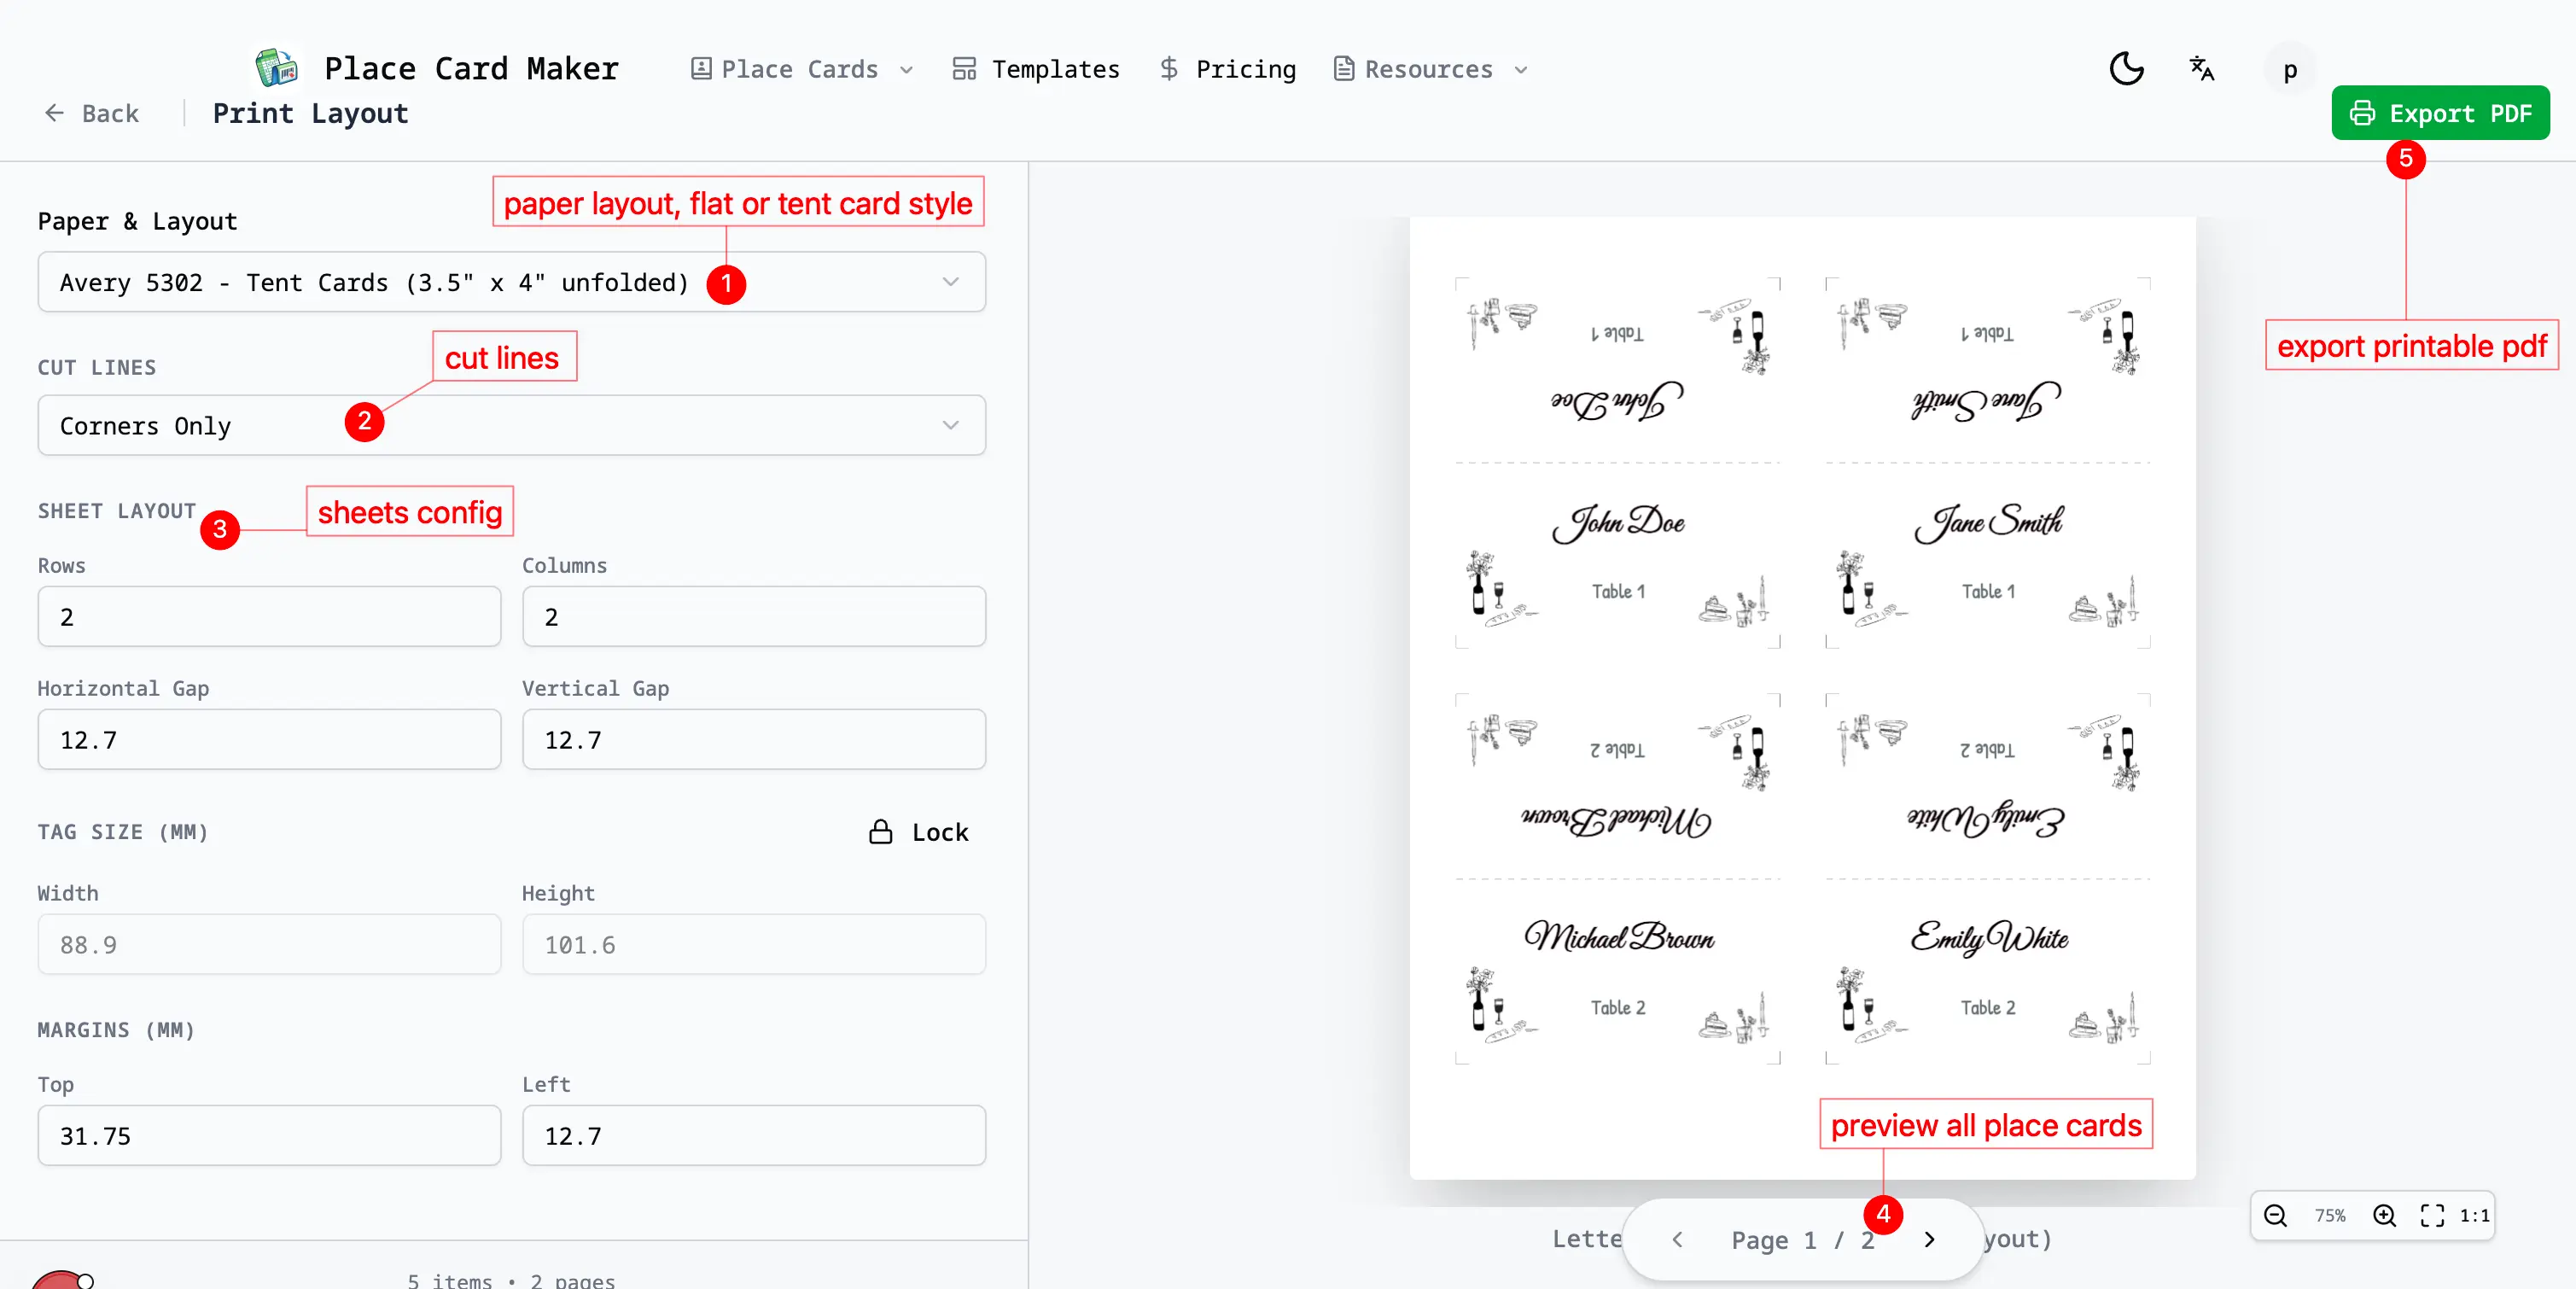
Step 6: Print or Export
- Click Print / Export PDF in the top toolbar
- In your print dialog, set scale to 100% (Actual Size) — never "fit to page"
- Load cardstock into your printer and print
Your place cards are ready to cut and fold. ✂️
Troubleshooting
| Problem | Fix |
|---|---|
| Cards cut off at edges | Print at 100%, not "fit to page" |
| Names not showing on cards | Check Data tab — rows must have a name entry |
| Wrong card size | Adjust width/height in Design tab |
| Tent card won't fold cleanly | Score the fold line with a bone folder before folding |
| Too much spacing between cards | Reduce margin in Settings tab |
Related Tutorials
Tutorials — Printable Place Cards from Spreadsheet Data
The core PlaceCard.us tutorials for importing spreadsheet data, designing place cards, and printing clean PDFs for weddings and events.
Quick Start: Print Place Cards from Google Sheets, Excel, or CSV
Learn the fastest PlaceCard.us workflow for importing spreadsheet data, mapping guest-list columns, and printing a complete PDF of place cards.